Saturday, December 3, 2011
Getting Published
I'm so excited, I just found out that one of my designs is going to be featured in the May 2012 issue of Bead Trends Magazine. I've never had one of my designs published in print before, and I'm extremely honored to be featured in a magazine that features so many talented artists. I'm not allowed to have my design online until the magazine is published, otherwise I would put a picture of it along with my post.
Sunday, November 20, 2011
What I Wish I Had Known
BE, that is Before Etsy, I sold my jewelry exclusively through home parties. I was very excitied once I finally started selling on Etsy to have another avenue to sell my jewelry through. However, I did encounter one problem: what was the best way to keep track of what sold at home parties so that I could take that inventory off of my Etsy store. My first attempt was simple to take the item off using my iPhone while I was doing the sale. Not only did this slow down the whole checkout process at parties, but in the excitement of a party, it just added to the stress. My next attempt was to take photos of everything as it sold, so that I could take it off Etsy immediately after the party. I found that in the excitement, I often forgot to snap a photo, and when I did, they weren't that great of photos due to the environment. I knew I needed a better system. I knew I needed an inventory system. Oh, how I wish I had implemented one AS I was listing stuff on Etsy, rather than 200+ items afterwards. This is how I went about creating my inventory system:
- I downloaded a list of my items currently for sale on Etsy. The link to download the file is located by clicking on the "Your Shop" link, then clicking on "Options", then selecting "Download Data". This allowed me to download a CSV file which contained a lot of the data I needed for my inventory system. If you are not familiar with CSV files, they are "Comma Separated Value" files that can be opened as a regular spreadsheet in Microsoft Excel or any other standard spreadsheet program. I downed loaded the file and saved it as an Excel spreadsheet.
- I hid the columns I was not going to use (I decided I'd keep the Title, Description, Price, Qty, and Image columns).
- I then added 4 columns before the first column. In the first column, I pasted the thumbnail image of the item from the page that comes up when you click on the "Your Shop" link. This is handy because the link to the item's Etsy page also is copied over - so if you ever need to deactivate or deleted the listing, you can just click on the image in your spreadsheet and it opens the right page in your web browser! The second column was a numerical ID number. I started with a 1 for the first item, 2, for the second, and had excel automatically fill in the number for all the items in the list. The third column I added was a alphabetically distinguisher that would help me be able to sort my inventory list by item type. For example, all my bracelets have "BR" in that column, all my necklaces have "N" in that column, and all my earrings have "EA". The forth column has the complete ID number, which is the alphabetical distinguisher combined with the numeric ID number (ie., BR27, EA13, etc.). The complete ID number is what I write on the price tags of my items.
Sunday, November 6, 2011
Better Photos of my Patina and Polymer Pendants
I was able to get some better pictures of my patina and polymer pendants:


Sunday, October 30, 2011
Whatever Became Of...
In my previous post I talked about the brass that I had patina'd. I finally had a little bit of time this weekend to take the concept a little further and turn the brass rectangles into pendants, with the addition of polymer clay, Vintaj brass wire, and some miscellaneous beads. I kind of got a little carried away with the polymer clay, so there are some pendants without brass, too. See the results below:


Saturday, October 22, 2011
Playing with Patina
My husband loves it when I incorporate metal work into my jewelry. He just bought me a huge sheet of brass to play around with. I had just found a really cool tutorial to patina brass on Melinda Orr's blog and couldn't wait to try it out. Here are the results of my first batch of pieces I tried this technique on.
 I love the results! I'm going to have lots of fun incorporating these into my jewelry! Thanks to Melinda for the wonderful tutorial!

Saturday, October 1, 2011
Wire Wrapped Bracelet Tutorial
Wire Wrapped Bracelet Tutorial
This tutorial will cover how to make the wire wrapped bracelet pictured below:


Okay, this is my first attempt at a tutorial, so please excuse the poor quality pictures (next time I'm enlisting my husband's help in taking pictures).
What you will need to create this bracelet:
3 - oval beads, approximately 20 x 13 mm
3 - barrel beads, approximately 12 x 10 mm
1 - czech glass faceted bead, approximately 10 mm x 10 mm
6 - 4 mm jump rings
1 - spool of 20 gauge wire (I used Parawire's Vintaj brass)
Tools:
Round nose pliers
Chain nose pliers
One of the main elements used in this bracelet is a double wrapped loop, let's begin with how to make one.

Slip the oval bead back onto the wire, and repeat the same process to make a double wrapped loop below. Next, use your round nose pliers to start to coil the end of one of the tails of wire. Once you have created a circle, switch to your chain nose pliers to avoid making dents in the wire as you continue curling the spiral. Once you have spiraled up the entire length of wire, repeat the process on the tail at the other end. Congrats, you have one bead made for your bracelet. Repeat this process on the remaining two oval beads.


This tutorial will cover how to make the wire wrapped bracelet pictured below:


Okay, this is my first attempt at a tutorial, so please excuse the poor quality pictures (next time I'm enlisting my husband's help in taking pictures).
What you will need to create this bracelet:
3 - oval beads, approximately 20 x 13 mm
3 - barrel beads, approximately 12 x 10 mm
1 - czech glass faceted bead, approximately 10 mm x 10 mm
6 - 4 mm jump rings
1 - spool of 20 gauge wire (I used Parawire's Vintaj brass)
Tools:
Round nose pliers
Chain nose pliers
One of the main elements used in this bracelet is a double wrapped loop, let's begin with how to make one.
Move the round nose pliers slightly to the side (approximately 3 mm) on the part of the wire that has been bent to the side and curl the wire up and around the pliers twice, so that there are two complete circles of wire on your pliers (see pictures below). Take the remaining tail of wire and wrap it neatly around the base of the loop. Do not trim the tail, as you will be using it to create a spiral later.

Slip the oval bead back onto the wire, and repeat the same process to make a double wrapped loop below. Next, use your round nose pliers to start to coil the end of one of the tails of wire. Once you have created a circle, switch to your chain nose pliers to avoid making dents in the wire as you continue curling the spiral. Once you have spiraled up the entire length of wire, repeat the process on the tail at the other end. Congrats, you have one bead made for your bracelet. Repeat this process on the remaining two oval beads.

Now we will wire wrap the barrel beads. Begin by cutting approximately 7 inches of wire and making a double wrapped loop approximately 2 inches from the end of the wire. Trim the tail of the wire on this top loop. Slip a barrel bead on the wire, then create another double wrapped loop at the bottom. You should have a long tail of wire at this end. Wrap the wire around the bead a couple times making your way from the top to the bottom of the bead, and then wrap the ends around the loop on the opposite end of the bead. Trim the excess wire. Repeat the process with one of the remaining barrel beads.

The remaining barrel bead will become the loop that the clasp will hook into. Cut a piece of wire approximately 7 inches long. Create a single wrapped loop (large enough to be easily hooked onto - approximately 4 mm in diameter) at one end, trim the excess tail of wire, and then slip the bead on the wire. Create a double wrapped loop at the opposite end of the bead, wrapping the tail of the wire around the bead in a fashion similar to what you did with the previous barrel beads, wrapping the end of the wire around the opposite loop and trimming any excess wire.
Next, we'll make the bead which will be the hook part of the clasp. Cut a piece of wire approximately 7 inches long. Make a double wrapped loop and slide the czech bead onto the wire. About 10-12 mm above the top of the bead, bend the wire back 180, so it goes back to the bead. At the top of the bead, wrap the wire around the spot where the wire comes out of the bead twice, then trim off any excess wire. Using your round nose pliers, make a slight notch approximately 4 mm from the top of the long wire loop you just created. Finish the hook by bending into shape, as shown below.

Now you have all the beads wrapped for your bracelet, you just need to complete the final assembly. Starting with the hook bead you just make, connect it to one of the wire wrapped ovals using a jump ring. Connect a wire wrapped barrel bead at the opposite end, using a jump ring again. Continue connecting oval and barrel beads, finishing with the barrel bead that has a single wrapped loop at the end.
I hope that my directions were clear and that you enjoyed this tutorial. Happy beading!
This bracelet is for sale on my Etsy shop at: http://www.etsy.com/listing/82946557/wire-wrapped-bracelet-orange-dyed-quartz
Saturday, September 10, 2011
Color My World
I've always been drawn to playing with color, whether it has been with paint and paintbrush, color pencils, or now with beads and clay. When I first started out making jewelry, most of my pieces had a monochromatic color palette, but I've since grown to love to mix it up a bit. I find inspiration for color everywhere, and some of the references I turn to frequently include the following:
- Jewelry How To Books - There are a ton of wonderful jewelry and beading books out there, and my library is stocked with quite a few of them. While I don't duplicate the designs in these, I do get great ideas for various color combos. One of my favorite color inspiration books, is Polymer Clay Color Inspirations by Lindly Haunani and Maggie Maggio.
- Stacks and Stacks of Beading and Hobby Magazines - I love pouring through my back issues of magazines like Stringing, Bead Style, and Bead Trends. When I'm in a rut, it always helps to sit back with a stack of these.
- Non-Hobby Books and Publications - My husband and I are currently planning to build a house, so immediately upon deciding to build, I picked up a few books on paint combinations for the interior of houses. I wasn't too surprised to find a lot of great color combinations that will work well in jewelry design. Those free little painting idea books that they have by paint samples also have some good combos.
- The Bead Themselves - While most of the strand of beads I buy are immediately cut apart and stored in plastic containers, I sometimes find myself playing with the strands - laying a few together at a time to see what kind of combination they will make.
- Making Something to Match - Another fun idea is making jewelry to match a specific item of clothing. It can be something you own, or something you see in an advertisement.
- Design-Seeds.com - I just found this site after becoming hooked on Pinterest. The site is just loaded with awesome color palettes!
Monday, September 5, 2011
Starfish Pendant Necklace
I recently purchase one of the humblebeads grab bags, and was so happy to find a cute little starfish pendant in it. It was perfect for the "Inspired by the Sea" challenge. I paired it with some beachy artisan lampwork glass beads from Etsy's GlassbyLeese, some gorgeous aquamarine nuggets that were a gift from my sister Lori, abalone shell, bronze colored mother of pearl, and some antique brass findings. And, the icing on the cake - I was able to take decent pictures of the piece this morning. Turns out the white balance setting on my camera had gotten set to the wrong setting. I'm so glad I discovered that!


This piece is available at my Etsy Shop
Sunday, September 4, 2011
Resistance was Futile
You'll notice something new on my blog... a link to a Facebook fan page. I have to say that opening a Facebook account gave me some heartburn. My resistance to joining is a very long story, but suffice to say that wisdom won out over emotion, and I now have an account. So if you get a chance, please stop by and like my fan page (http://www.facebook.com/pages/Inspired-Theory/262799490407168)! Thanks so much!
Friday, September 2, 2011
Oh crap! Projects That Don't Turn Out
I was very excited by the Humblebeads "Inspired by the Sea" Challenge. I had a great idea - a sea anomone necklace. I even knew how I was going to go about it. I researched anomones. I made up custom color mixtures, I did skinner blends, even a cane to get the color gradiation that would be the center of my anomone. And I spent a lot of time trying to make it just what I envisioned. Unforunately, when it was all finished, I wasn't happy with it at all. For starters it was way too large - about 3.5 inches across... and it just wasn't what I had in my mind. Now it sits on my desk, taking up space. I should probably just throw it... but I just can't bring myself to do that just yet, after spending so many hours on it. I may come back to the idea and try some other ways of going about it... but not right now. I can't help but wonder what other people do with their projects that don't turn out - toss them away, or tuck them away in a box...


Inspired by The Sea Challenge
When I saw the Humblebeads Challenge was "Inspired by the Sea", I knew this was the perfect opportunity to use the wonderful artisan lampwork glass bead with a starfish on it that I had purchased from Glass by Leese. I was so happy with it, that I decided I couldn't part with it. Unfortunately the photos really don't do it justice. Apparently the morning light is a lot weaker in fall than it is in summer. It goes to figure, just when I think I have the lighting thing figured out - things change.


Sunday, August 28, 2011
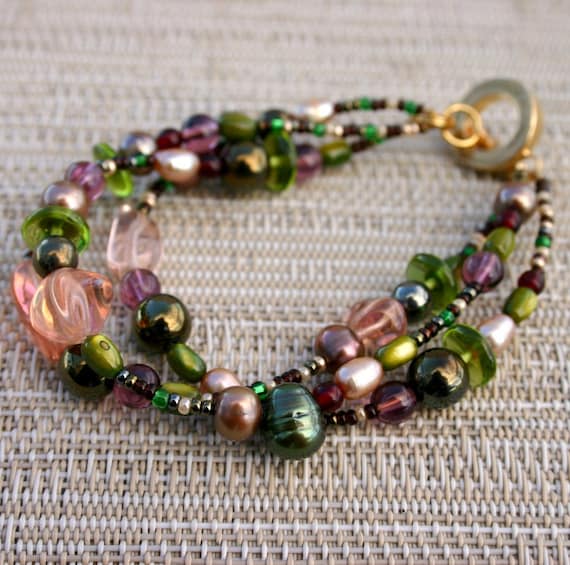
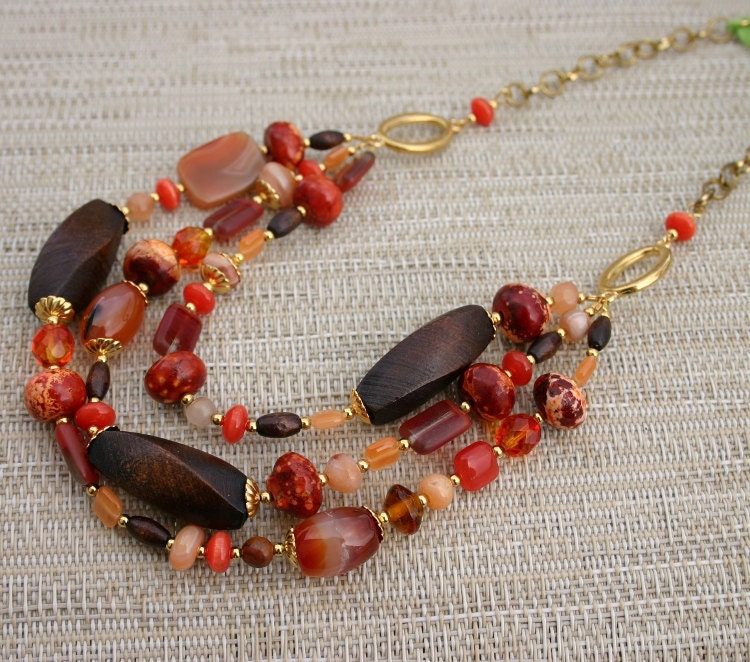
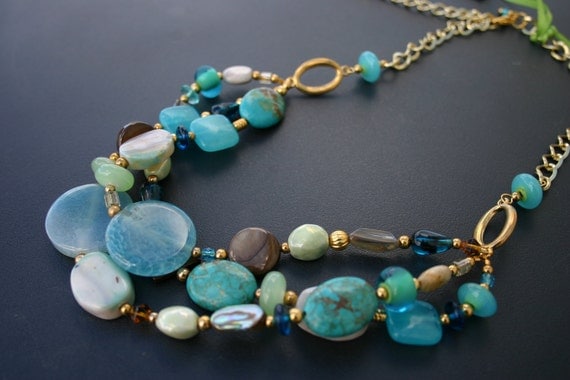
Beading Buddies
One of the things that I find that inspires me the most is being able to share the beading experience. I'm very fortunate to have two sisters (Cindy and Lori) who share the love of making jewelry with me. We've spent countless hours together putting together creations, bouncing ideas off of each other, and just enjoying time together beading. Unfortunately Lori moved to Denver a couple years back and we haven't been able to get together to bead much since (however we do get together to go to the Denver Bead Show in March - now that is fun!). Last weekend I was able to spend almost the whole day Sunday together with Cindy beading - and it was amazing how the inspiration and creativity kept flowing. I lost track of how many pieces I made, but it was quite a few. What follows are a few of the pieces that were created during our "beading party."


Saturday, August 27, 2011
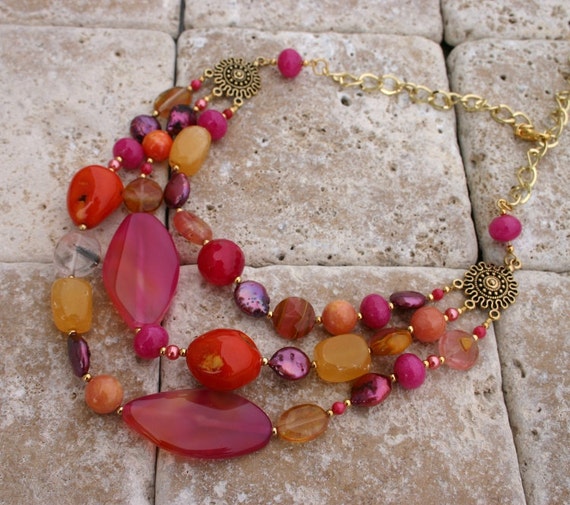
The Bead Whisperer?
Sometimes the beads speak to me. Not in the maybe-she-should-be-locked-up-in-a-mental-hospital way, but I can just look at them and know what I should do with them - just as if they themselves know what their final form should be. This was very true with this strand of faceted citrine nuggets I had stashed away. I always have the bad habit of saving the beads I really like "for something really special" - as was the case with this strand. In all reality, I'm probably scared of making something not worthy of the beads themselves. But these beads spoke to me the other day, and I knew what to do with them. What they chose is shown below.


I'm Jumping In
Well, I guess I've held off long enough on the social media thing and have finally decided it is time to jump in with both feet. I'm sure everyone has that initial fear of "what will I say", "will people care", etc. I've been totally obsessed with making jewelry for so long now that I can't even remember. I find inspiration everywhere, and have been referred to as a "prolific designer" - I'd like to share some of my inspiration, tips and hints, and designs. But this is my start - my dipping the toes in the water.
Subscribe to:
Posts (Atom)